Recently, while working on one of the projects. I came across the requirement to use Timescaledb. I use postgress.app for managing different versions of PostgreSQL for different projects. This was my first encounter with timescaledb, I had never used it before. So, I started to look at the official documentation and follow the steps mentioned in the macOS (section). One thing, I was sure of after reading the documentation is that these steps will not be going to work in my case(with postgress.app). My suspicion was right and I struggled in configuring it. This mini blog is about the insight steps that I learned from different sources on the internet while installing timescaledb.
Steps
- The most obvious requirement for installing
timescaledbis to have Postgress.app installed. - After installing Postgres.app we will install the timescaledb. For this, we will follow below steps from the official documentation.
- Open your terminal and run
brew tap timescale/tapbrew install timescaledb
- Next, we have to run
timescaledb-tunewhich requires passing thePostgrespath with the version number of Postgres.(NOTE: Suppose, you have multiple version of Postgres say 13 and 14 and we want to install timescaledb on version 14 so we will usevar-14in theconf-path). - Run following script
timescaledb-tune --yes --conf-path=/Users/<user_name>/Library/Application\ Support/Postgres/var-14/postgresql.conf - Navigate to
/opt/homebrew/Cellar/timescaledb/and you will see folder with some number, it is nothing but timescaledb version. In my case, it is2.8.1so we will be using it in the below script. So, run the below script with your timescaledb number.
/usr/bin/install -c -m 755 $(find /opt/homebrew/Cellar/timescaledb/2.8.1/lib/timescaledb/postgresql@14/ -name "timescaledb*.so")  /Applications/Postgres.app/Contents/Versions/14/lib/postgresql

/usr/bin/install -c -m 644 /opt/homebrew/Cellar/timescaledb/2.8.1/share/timescaledb/* /Applications/Postgres.app/Contents/Versions/14/share/postgresql/extension/
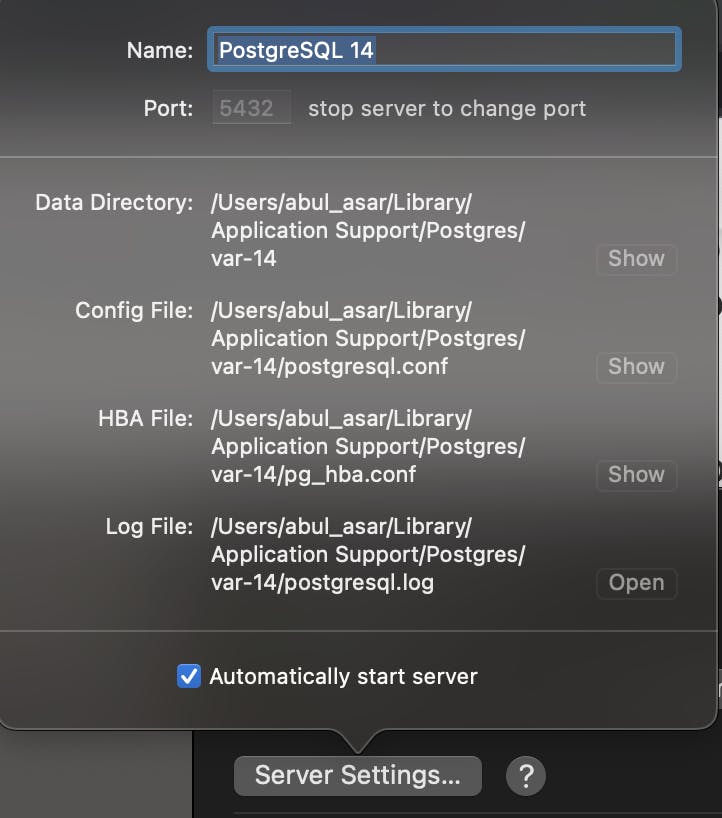
- After this open the Postgress app and click the
Server Settingsbutton
- It will open a popup on which will click on the
showbutton ofconfigi.e second option.
- This will open a folder with
postgresql.conffile selected. Now, open this file and add the following lines at the end of the file.shared_preload_libraries = 'timescaledb' - Now, restart the Postgres app. Double click on your database from the list of the database in the app. It will open the command prompt of the selected database. After that run the following command
CREATE EXTENSION IF NOT EXISTS timescaledb; - This will add timescaledb for your particular database.
I hope you like this blog. If you have any questions then please comment below. Thanks for reading 😊.

